# Creating a new template
# Overview
Users can create new templates or modify existing templates to allow easy creation of default content.
💡 Hint
We assume you've created a new Ruble as a placeholder for the following content.
# Creating a new file template
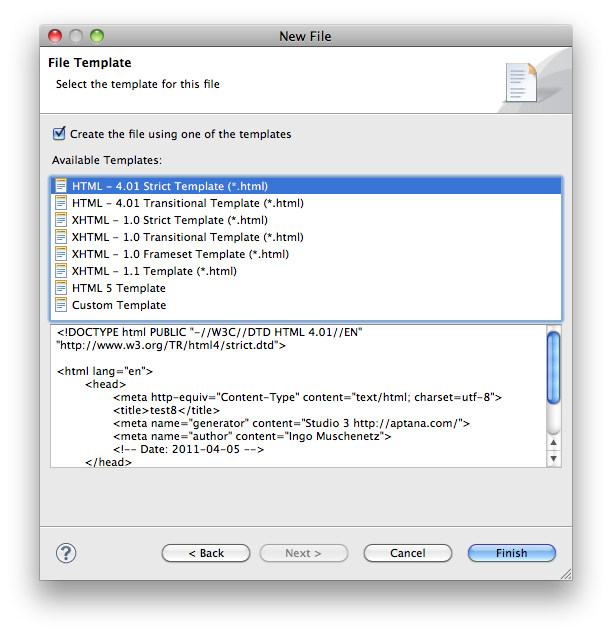
New file templates are templates that show up after a user has entered a file name and has clicked the Next button:
Open the existing bundle.rb file
Add the following content to the bottom of the file:
template "Sample File Template" do |t|
  t.filetype = "*.txt"
  t.location = "templates/sample.txt"
end
Replace the "sample" and "txt" values with values appropriate to your filetype.
Create a templates folder underneath the rublename.ruble folder.
Drop-in file sample.txt (or the specific file you have created).
Save and close bundle.rb.
If you now go to File > New > File... and create a file name of the appropriate extension above, you should see your template in the list.
# Creating a new project template
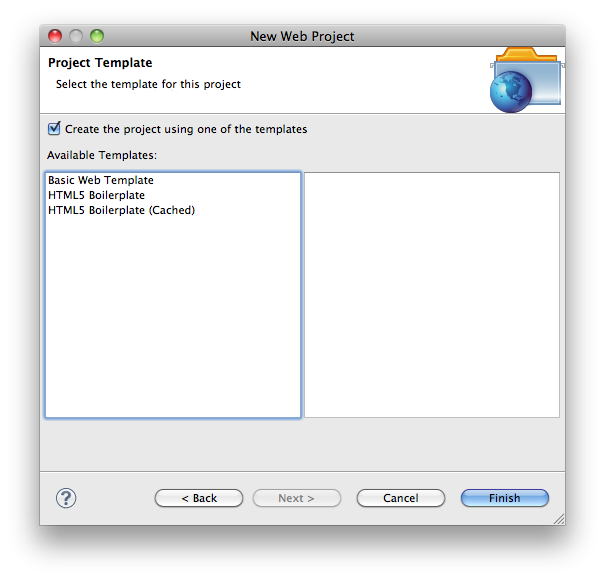
New project templates are templates that show up after a user has entered a project name and has clicked the Next button:
You can create project templates that reference a local .zip file or retrieve content from the web.
# Project types
Project templates can be added to existing project wizards by the specification of the "type" element:
Type | Project |
all | All project types |
ruby | Ruby projects |
php | PHP projects |
web | Web projects |
python | Python projects |
titanium_desktop | Titanium Desktop projects |
titanium_mobile | Titanium Mobile projects |
# Local content
If your content is hosted locally, you can reference a .zip file containing the files in question.
Create a templates directory in the bundle and add a project_templates.rb file in the templates directory.
Add the following content to the project_templates.rb file:
require 'ruble'

project_template "Sample Project Template" do |t|
  t.type = :web
  t.location = "templates/sample_project.zip"
  t.description = "A sample project template"
  t.icon = "template.png" // Ideally a ruble-relative path to a 48x48px icon. Could also be a URL to a remote file
  t.tags = ['Titanium Classic']
end
Replace the template name, "web", and "sample_project.zip" values with values appropriate to your project.
Drop the file sample_project.zip in the templates folder.
Save and close project_templates.rb.
File > New > Project... and create a project of the appropriate type above; you should see your template in the list.
# Remote content
⚠️ Warning
Note that this does not yet work for Titanium projects. See bug http://jira.appcelerator.org/browse/TISTUD-640 (opens new window) for status on that feature.
If you instead have a project template hosted on a Git repo, you can reference that as well:
Create a templates directory in the bundle and add a project_templates.rb file in the templates directory.
Add the following content to the project_templates.rb file:
require 'ruble'

project_template "Sample Remote Project Template" do |t|
  t.type = :web
  t.location = "git://github.com/repo.git"
  t.description = "Remote template. Requires network access."
  t.icon = "template.png" // Ideally a ruble-relative path to a 48x48px icon. Could also be a URL to a remote file
  t.tags = ['Titanium Classic']
end
Replace the template name, "web", and "location" values with values appropriate to your project.
Save and close project_templates.rb.
File > New > Project... and create a project of the appropriate type above; you should see your template in the list.
The Ruble Specification gives a complete discussion on the new Ruble scripting system in Studio.
# Template variables
It's possible to add template-variables in the project's template files. Those variables will be substituted with the appropriate content as the project is created.
⚠️ Warning
By default, variables are not replaced. If you need to turn this on, use "t.replace_parameters = true" in the project template definition to enable substitution
The following variables are supported:
TM_NEW_FILE_BASENAME | The file name, without the file extension. |
TM_NEW_FILE | The absolute path to the current file. |
TM_NEW_FILE_DIRECTORY | The directory path for the current file. |
TM_PROJECTNAME | The name of the created project. |
TIME | The current time (in words). |
YEAR | The current year. |
Variables should be inserted inside a ${} blocks into your code. For example:
Project name is ${TM_PROJECTNAME}.